マイクロビット(m_20)モジュール microfs、 filesystem
module – microfs、filesystem
(d-20)microfs モジュール
microfsを使って、マイクロビットにファイル操作ができます。※Micropython on BBC:micro:bitとは別です。そのため別途インストールが必要です。
Thonny同梱のPython上やターミナル(コマンドプロンプト)で操作します。※詳細はmicrofsのサイト「https://microfs.readthedocs.io/en/latest/」を参照してください。
インストール
microfsを使うにはmicrofsモジュールをインストールします。
通常のPythonからインストールします。メニューのTools>Options>InterpreterからThonny組込みPythonに設定されていることを確認します。
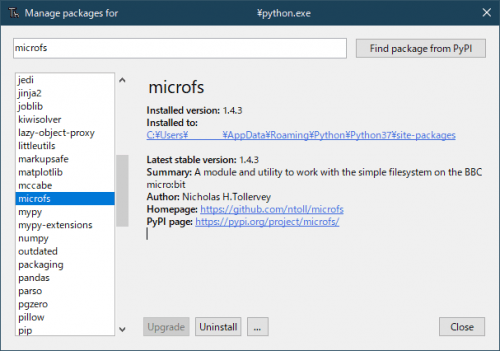
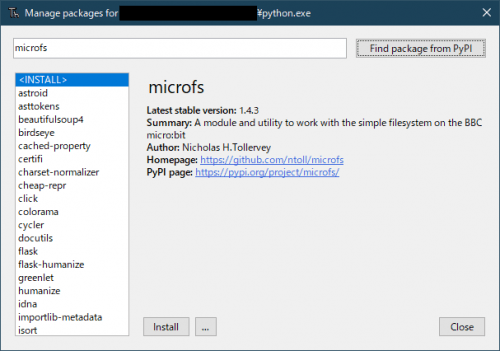
ThonnyのメニューからTools>Manage Packagesを選択してインストールします。
「microfs」を検索してInstallします。
使い方
microfsには2つの使い方があります。
Pythonコードの中のモジュールとして使う方法と、コマンドライン(ターミナル)から使用する方法です。
Pythonコードには以下の関数などがあります。
ls、rm、get、put
コマンドラインでは以下のコマンドがあります。ufs [command] で使用します。
ls、rm、put、get
①Pythonシェルで操作
※Thonny同梱のPython上で操作します。
microfsのモジュールを読み込むと「ls, rm, get, put, get_serial」の関数が使えます。
(20-01)microfs.ls()
micro:bit上のファイルをリストアップします。
>>> import microfs
>>> microfs.ls()
['main.py', 'boot.py', 'error.log',']
(20-02)microfs.rm = rm(filename)
micro:bit上のファイルを削除します。
>>> microfs.ls()
['microfs_dev.py', 'main.py']

>>> microfs.rm('microfs_dev.py') #'microfs_dev.py'を削除
True
>>> microfs.ls()
['main.py']
(20-03)microfs.get(filename)
micro:bit上のファイルをパソコンの作業ディレクトリにコピーします。
>>> import microfs
>>> microfs.ls()
['main.py']

>>> microfs.get('main.py')              # 同名でコピー
True

>>> microfs.get('main.py','microfs.py') # 'microfs.py'名でコピー
True
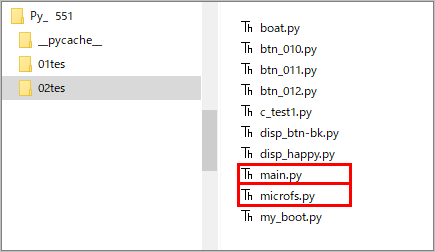
ワークホルダにコピーされています。
(20-04)microfs.put(filename)
パソコンの作業ディレクトリにあるファイルをmicro:bit上にコピーします。
>>> microfs.ls()
['main.py']

#パソコン側の'microfs_put.py'をmicro:bitに'microfs_dev.py'名でコピーする
>>> microfs.put('microfs_put.py','microfs_dev.py')
True

>>> microfs.ls()
['microfs_dev.py', 'main.py']           # コピーを確認
(20-05)microfs.get_serial
シリアル接続の情報が返ります。
>>> microfs.get_serial()
Serial<id=0x340a170, open=True>(port='COM3', baudrate=115200, bytesize=8, parity='N',
stopbits=1, timeout=1, xonxoff=False, rtscts=False, dsrdtr=False)
②コマンドラインで操作
ufs
Thonnyでターミナル(コマンドプロンプト)を開きます。
メニューから「Tools>Open system shell」を選択します。Thonnyから開くと位置が作業ディレクトリになっているので便利です。
(20-06)ufs ls
micro:bit上のファイルを一覧表示します。
C:\***tes>ufs ls
main.py boot.py error.log
(20-07)ufs rm foo.txt
micro:bit上のファイルを削除します。
C:\***tes>ufs ls
main.py boot.py error.log

C:\***tes>ufs rm error.log      # error.log を削除する

C:\***tes>ufs ls
main.py boot.py                 # 削除を確認
(20-08)ufs put hoge.txt
パソコン側からmicro:bit上ファイルをコピーします。
C:***tes>ufs put hello.txt      # PC側の’hello.txt’をmicro:bitにコピー

C:***tes>ufs ls
main.py boot.py hello.txt       # 確認
(20-09)ufs get remote.txt
micro:bit上のファイルをパソコン側にコピーします。
C:***tes>\Py_B551\02tes>ufs ls
main.py boot.py hello.txt

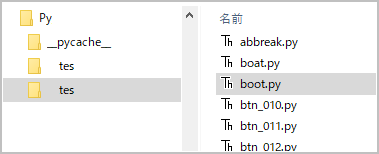
C:***tes>ufs get boot.py
(d-21)filesystemについて
(21-01)open(filename, mode=’r’)
with open(‘filename’, mode=’r’) as my_file:
# with を付けるとブロックを抜けたら MicroPython が自動でファイルをクローズしてくれます。
‘r’:テキストモードでの読み込みします。
‘w’:書き込みします。(上書きします)。
‘t’:テキストモード(文字列の読み書き用)
‘b’:バイナリモード(バイトの読み書き用)
‘rb’ならバイナリの読込モードになります。※BBC:MicroPythonには’a’追記モードは無いようです。
from microbit import *
with open('hello.txt','r') as my_file:
    txt=my_file.read()
    print(txt)
(21-02)close()
ファイルを閉じます。すでにクローズしている場合は効果がありません。
(21-03)name()
オブジェクトが表すファイルの名前を返します。
>>> my_file.name()
'hello.txt'                 # 実際のファイル名
(21-04)read(size)
ファイルデータを読み込みます。readモードでファイルを開く必要があります。
size が与えられないか -1 の場合はファイルに含まれるすべてのデータが返されます。
先のスクリプト
‘hello.txt’の中身が全て表示されます。
#readに’11’をセットして以下に変更すると
txt = my_file.read(11)
実行結果
>>> %Run 1010_filesys_01.py
hello hello                 #最初の11文字が返ります。
(21-05)readinto(buf)
バッファ buf に文字列またはバイト列を読み込みます。
from microbit import *
myBuffer = bytearray(10)            # 10バイトのアレイ
with open('hello.txt','r') as my_file:
    s = my_file.readinto(myBuffer)
    print(s)
    print(myBuffer)
実行結果
>>> %Run 1011_read_into_01.py
10                                  # バイト数が返る
bytearray(b'hello hell')            # 保存された10バイトの文字
(21-06)readline()
ファイルから1行を読み込んで返します。
from microbit import *
with open('hello.txt','r') as my_file:
    while True:
        txt=my_file.readline()
        if txt == "" :
             break
        print(txt, end="")          # 改行なしにする
実行結果
>>> %Run 1011_readline.py
hello hello HELLO HELLO
ABCDEFG abcdefg
123456 あいうえお
Thonny microbit
(21-07)writable()
書き込み可能か確認します。
from microbit import *
with open('hello.txt','r') as my_file:  # read モードで開く
    print(my_file.writable())

with open('hello.txt','w') as my_file:  # write モードで開く
    print(my_file.writable())
実行結果
>>> %Run 1011_writable_01.py
False       # read モードなのでFales
True        # write モードなのでTrue
(21-08)write(buf)
ファイルに書込みます。writeモードでファイルを開く必要があります。
前データは消えます。
from microbit import *
with open('hello.txt','w') as my_file:
    my_file.write('world')              # 'world'を書き込む

with open('hello.txt','r') as my_file:
    txt=my_file.read()                  # 書き込みを確認
    print(txt)
実行結果
>>> %Run 1011_write_01.py
world                   # 'world'が書き込まれている
まとめ
thonny-microbitのモジュール microfsとfilesystem について記載しました。
